
-
Overview
-
Bulk SMS
-
Group SMS
-
Leads & Contact Book
-
Two way SMS
-
Autoresponder
-
Campaign/Scheduler
-
Buy Numbers
-
Black List (DND)
DOCUMENTATION
This manual will explain you how the platform is functioning so with help of this documentation you can learn easily how to use this platform.We have tried our best way to explain you with screen shot of each module with small description.
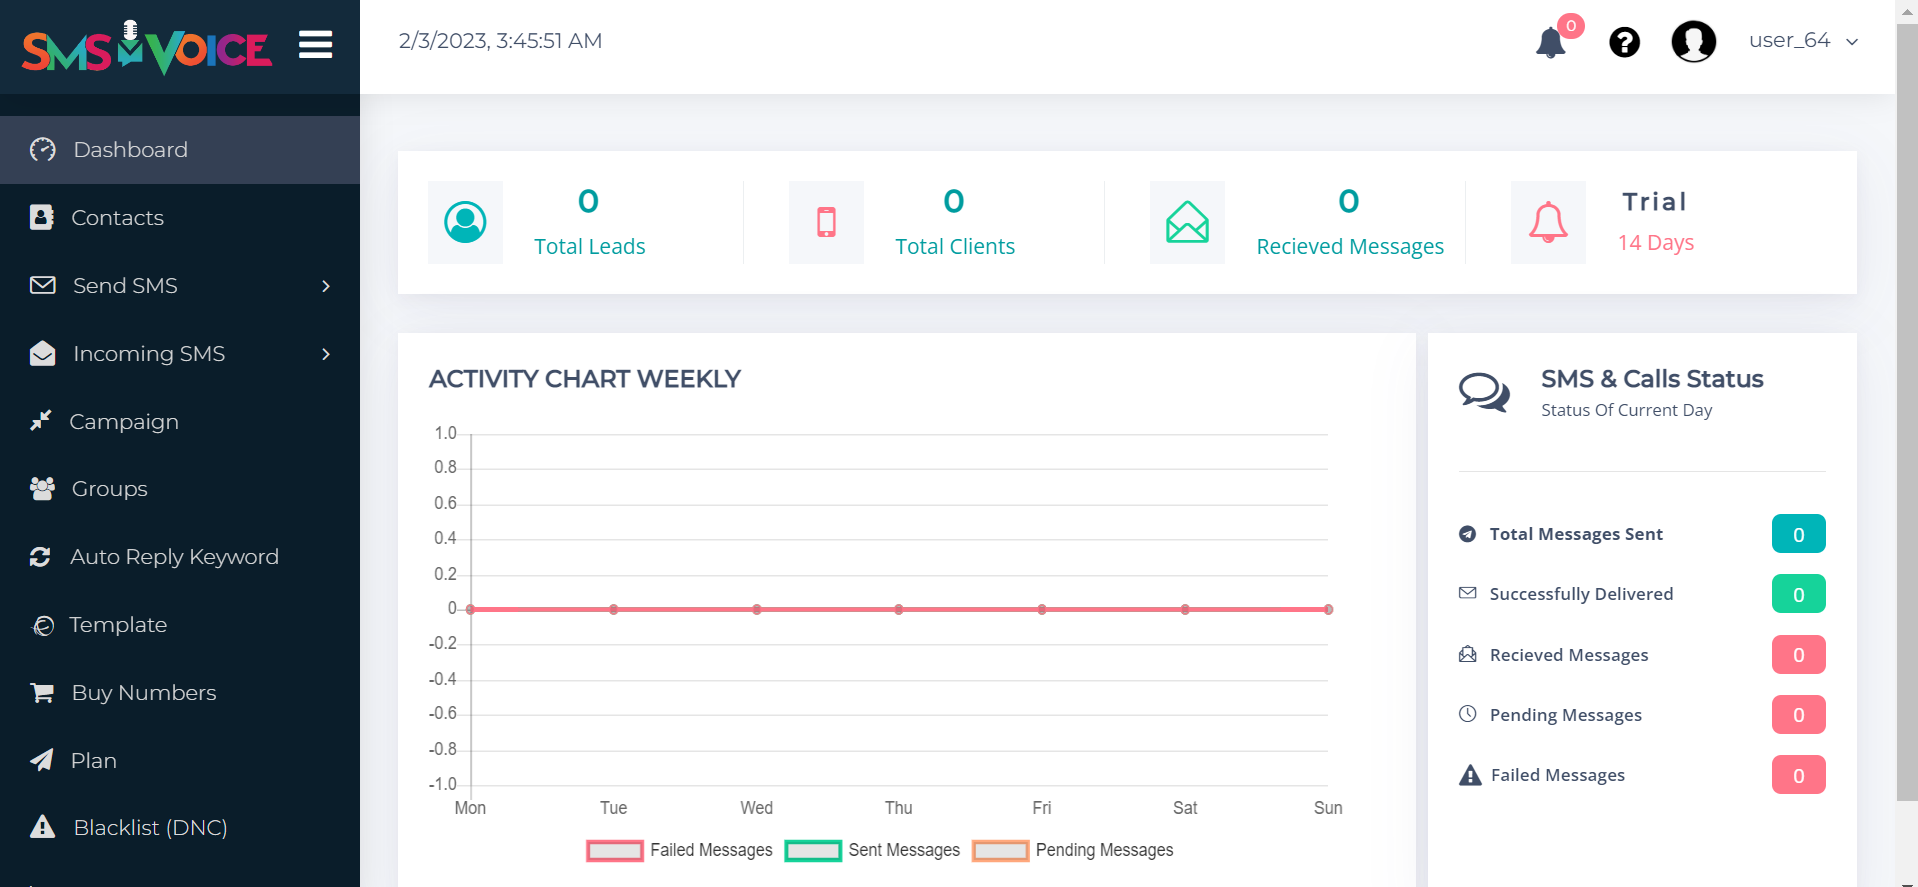
Bulk SMS
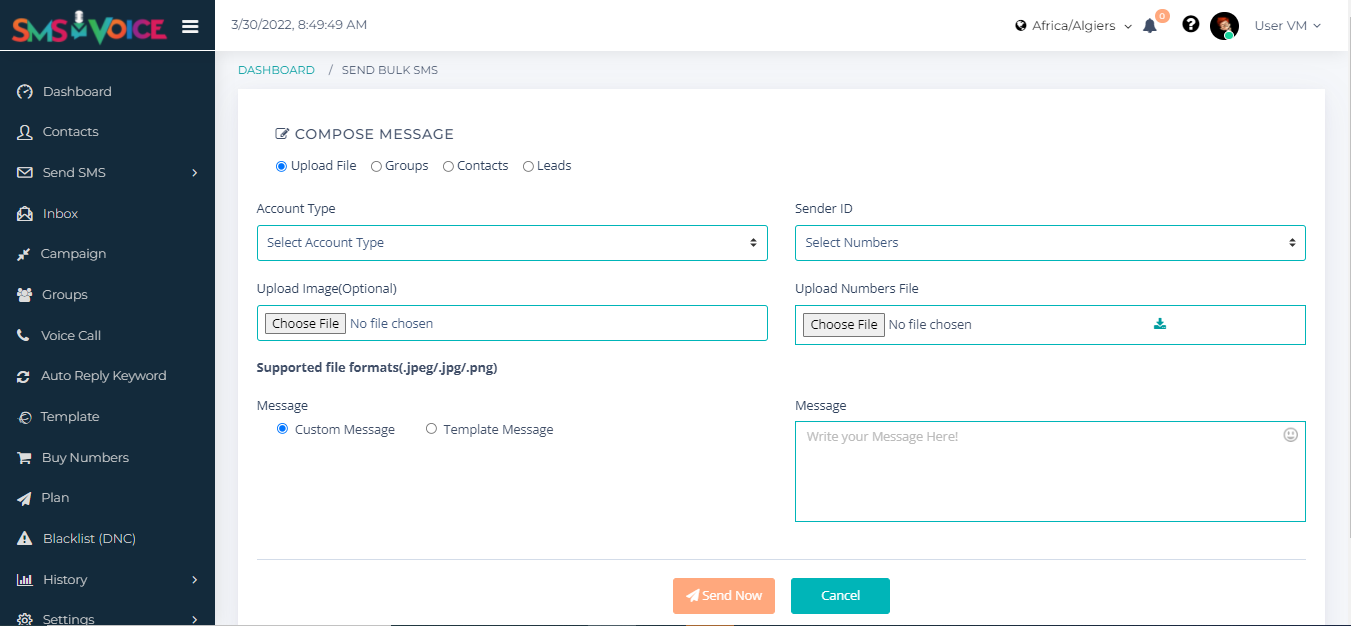
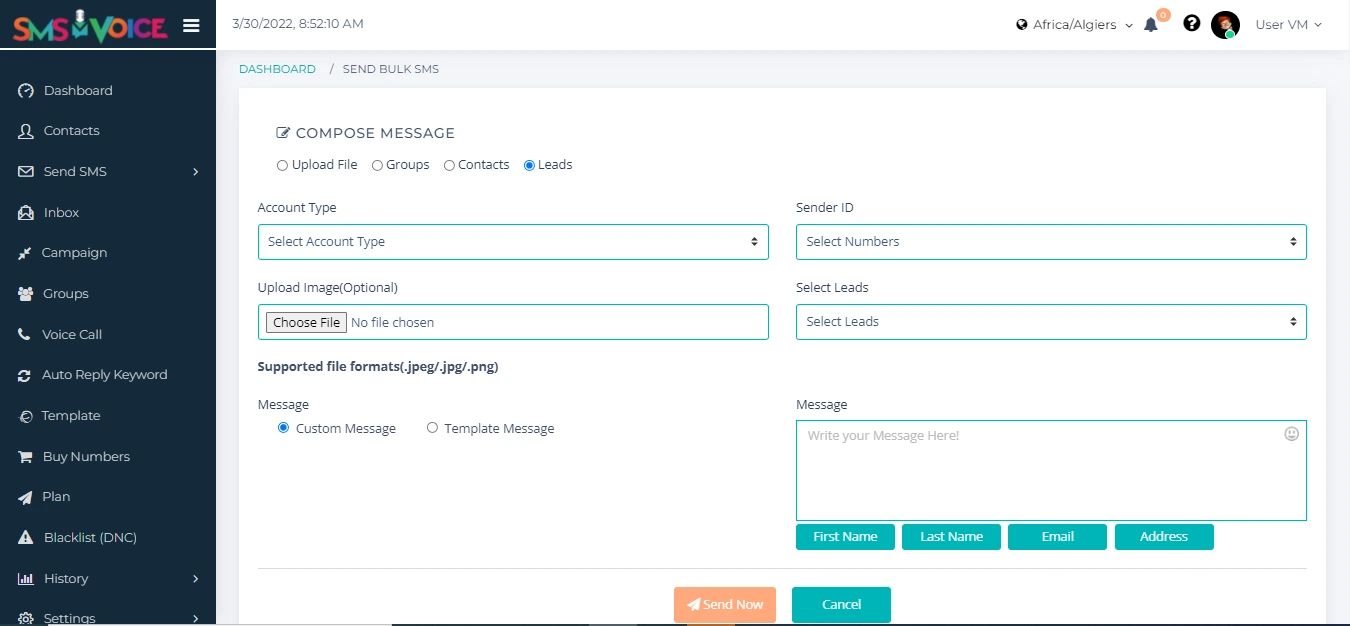
If you want to broadcast your messages all you need to do is select your recepients/groups/leads. You can also send large number of files at the same time. To do so kindly select any item below.
Upload File
- Step 1: Select the Upload Type to Upload File
- Step 2: Set the Account Type to Twilio
- Step 3: Select your Phone Number
- Step 4: Upload the file by clicking on Choose File
- Step 5: Select the image.It’s Optional
- Step 6: Select the Message Type. You can either set it to custom or select a template
- Step 7: Finally, type the Message and press send. See It’s that easy
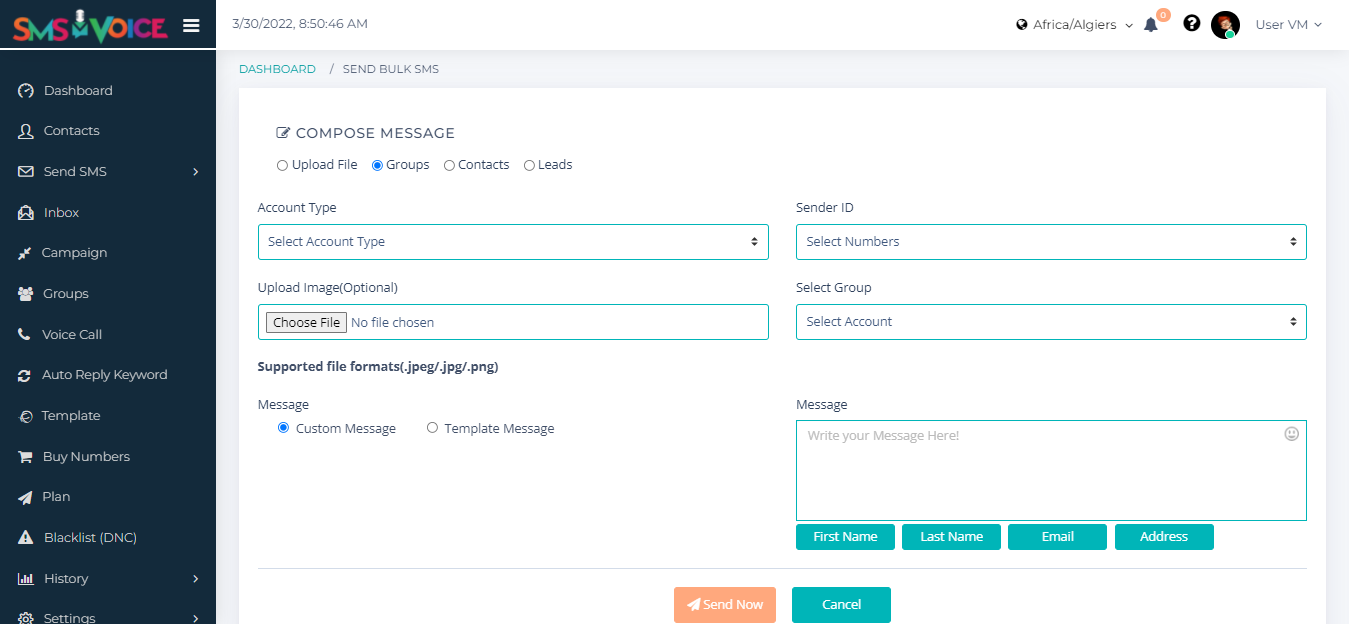
Group
- Step 1: Select the Upload Type to Upload File
- Step 2: Set the Account Type to Twilio
- Step 3: Select your Phone Number
- Step 4: Upload the file by clicking on Choose File
- Step 5: Select the image.It’s Optional
- Step 6: Select the Message Type. You can either set it to custom or select a template
- Step 7: Finally, type the Message and press send. See It’s that easy
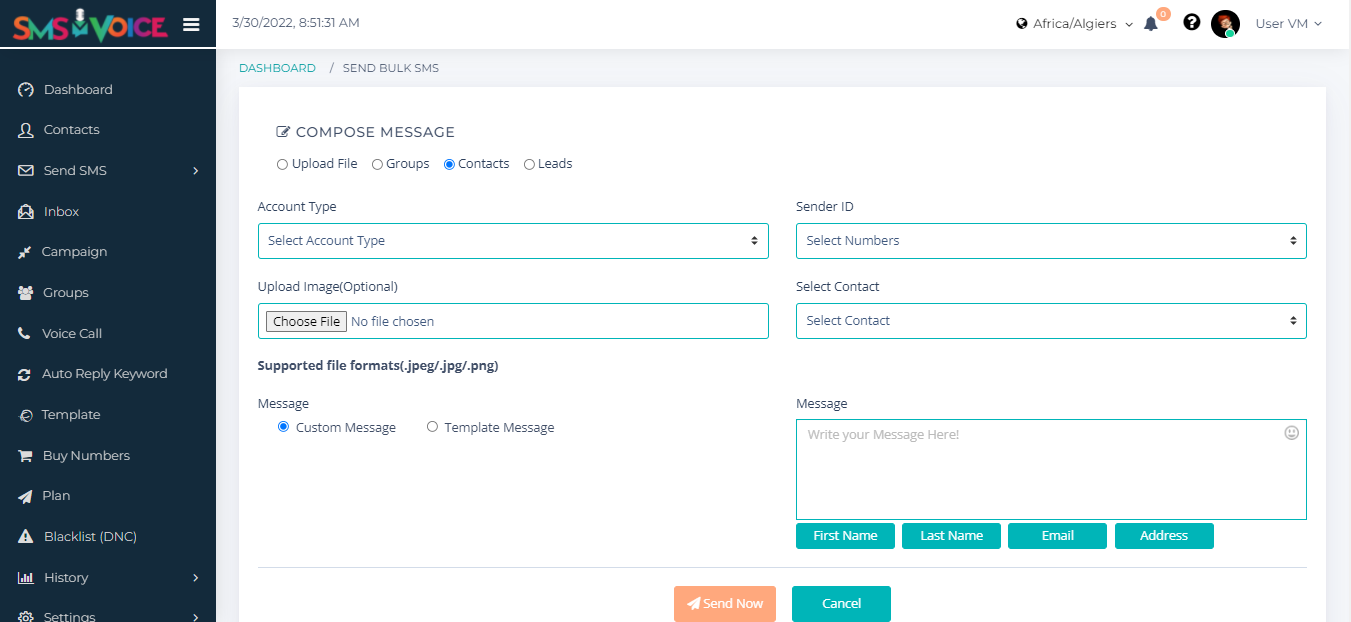
Contacts
- Step 1: Select the Upload Type to Contacts
- Step 2: Set the Account Type to Twilio
- Step 3: Select your Phone Number
- Step 4: Select your contact by clicking on Select Contact dropdown menu
- Step 5: Select the image.It’s Optional
- Step 6: Select the Message Type. You can either set it to custom or select a template
- Step 7: Finally, type the Message and press send. See It’s that easy
Leads
- Step 1: Select the Upload Type to Leads
- Step 2: Set the Account Type to Twilio
- Step 3: Select your Phone Number
- Step 4: Select your Leads by clicking on leads
- Step 5: Select the image .It’s Optional
- Step 6: Select the Message Type. You can either set it to custom or select a template
- Step 7: Finally, type the Message and press send. See It’s that easy
Group SMS
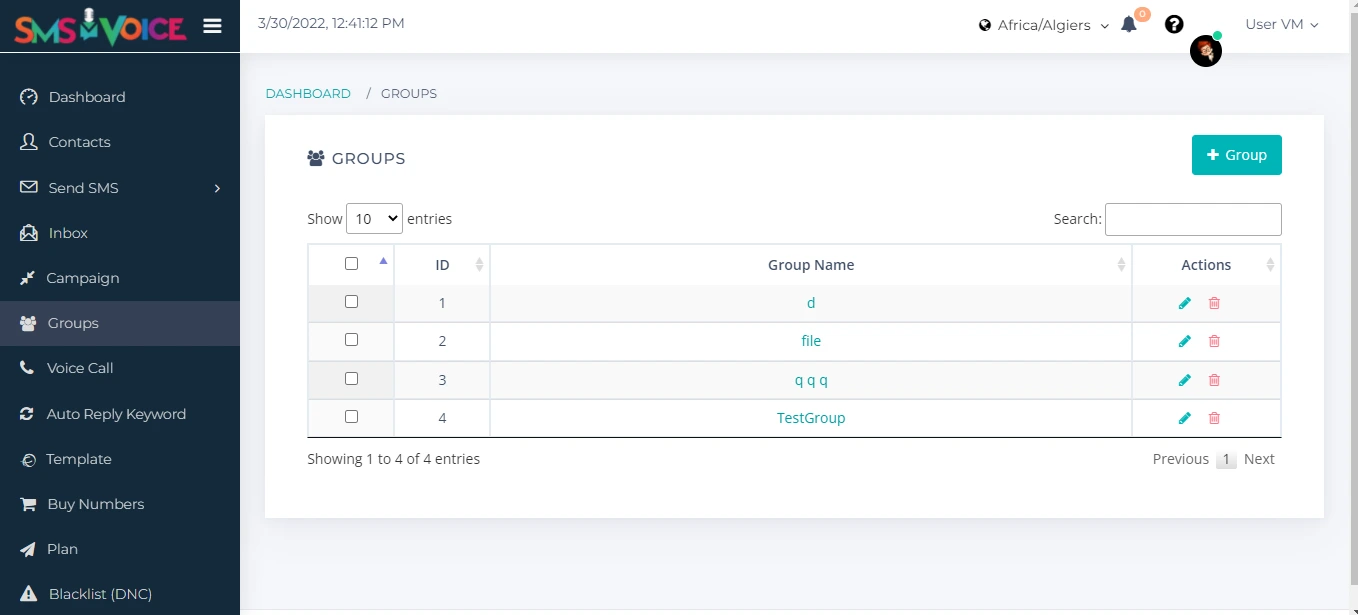
Groups panel is going to provide you with all the details one has about the subscribers. Also you can add new groups, delete old ones and edit each. To do so, kindly follow the below steps.
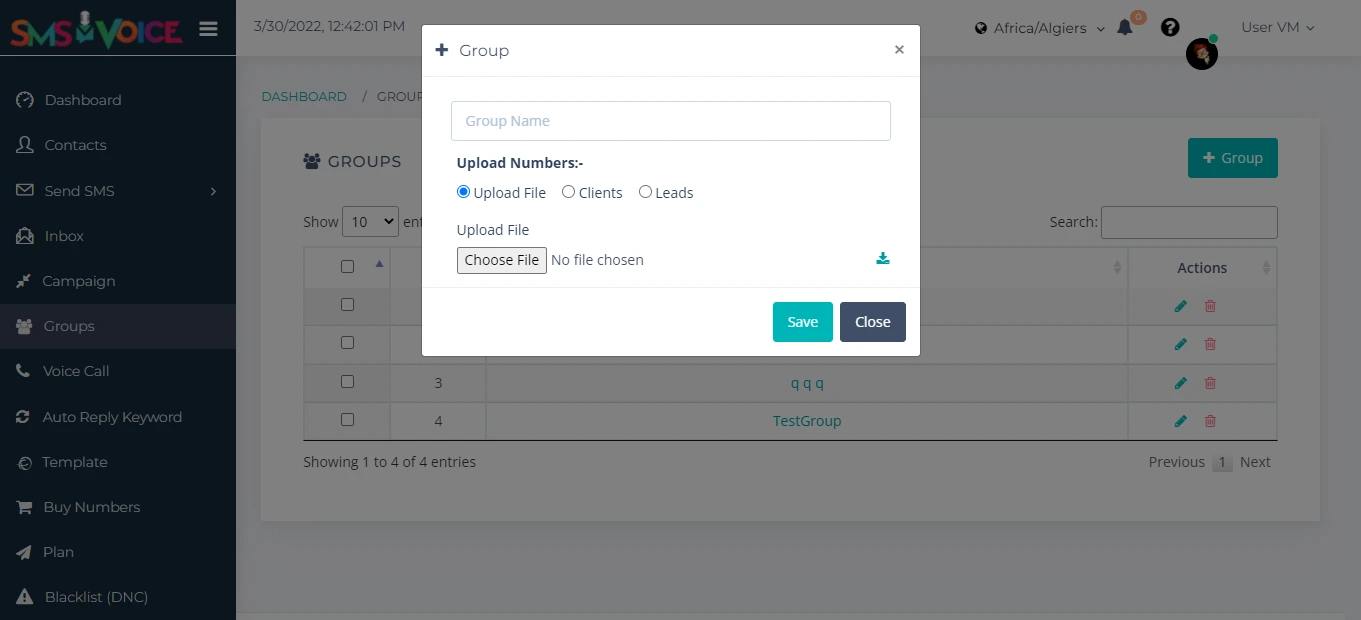
Adding New Group
- Step 1: Click on the
- Step 2: In the new emerged window, type in the name of the group and import it by choosing the file.
- Step 3: Press the
Leads and Contact Book
Leads is a section in which you can include the details of the links that could come up with the clients in the future.In the above section you are provided with the following actions :
- Step 1:Add New Lead
- Step 2:Import Leads
- Step 3:Load Spreadsheet Data
- Step 4:Example Leads Data File
- Step 5:Export Data Lead
Adding New Lead
- Step 1: Click on the
- Step 2: In the new emerged window, type in the details. Example:- Name,Email,Mobile Number etc.
- Step 3: Press the
Import Leads
- Step 1: To import leads click on the
- Step 2: In the new emerged window, Choose your file.
- Step 3: Press the
Export Lead Data
To export all the details of your Leads into your device, Press the
Voice Call
Steps to make a call
- Step 1: Type in the number you want to call.
- Step 2: Press the green button to give a call.
- To disconnect a call press the red button.

Two way SMS
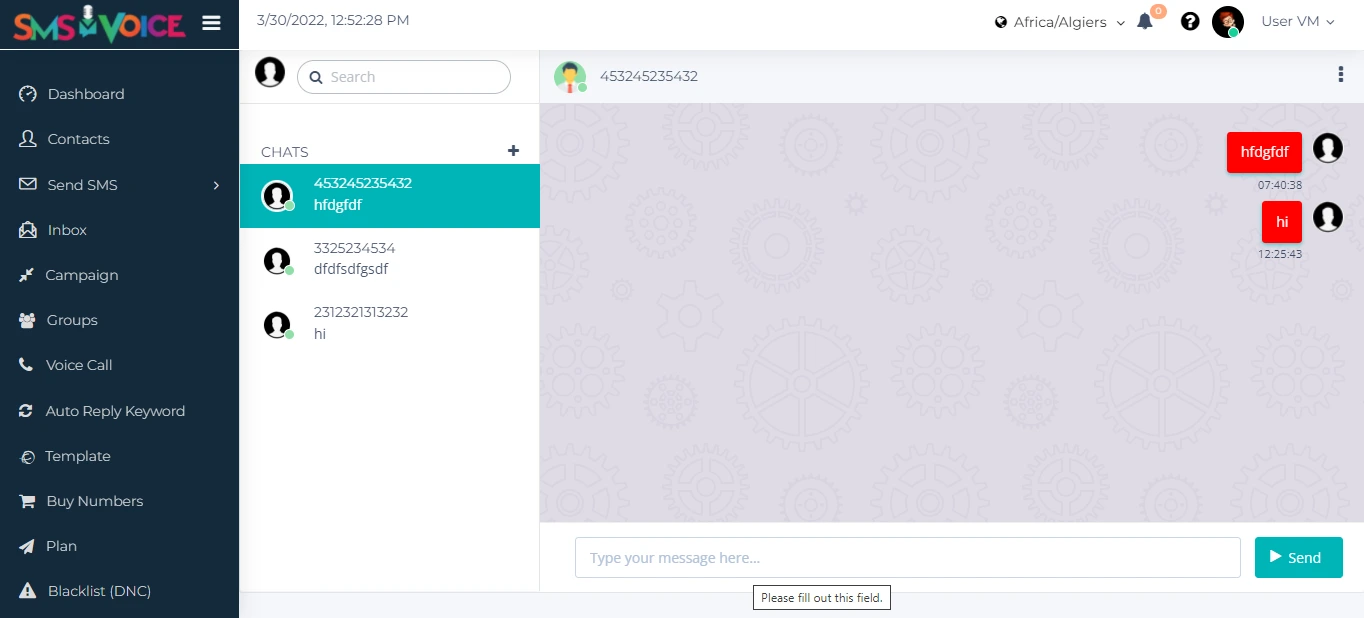
If you want to chat with your customer then we provide the chat panel for your customer. You can easily interact with your customer from two way sms chat.
SMS Chat
- Step 1: Click on Message Tab on the left sidebar.
- Step 2: Select Inbox.
- Step 3: Click on the mobile number you want to chat.
- Step 4: Then chat panel wil open.
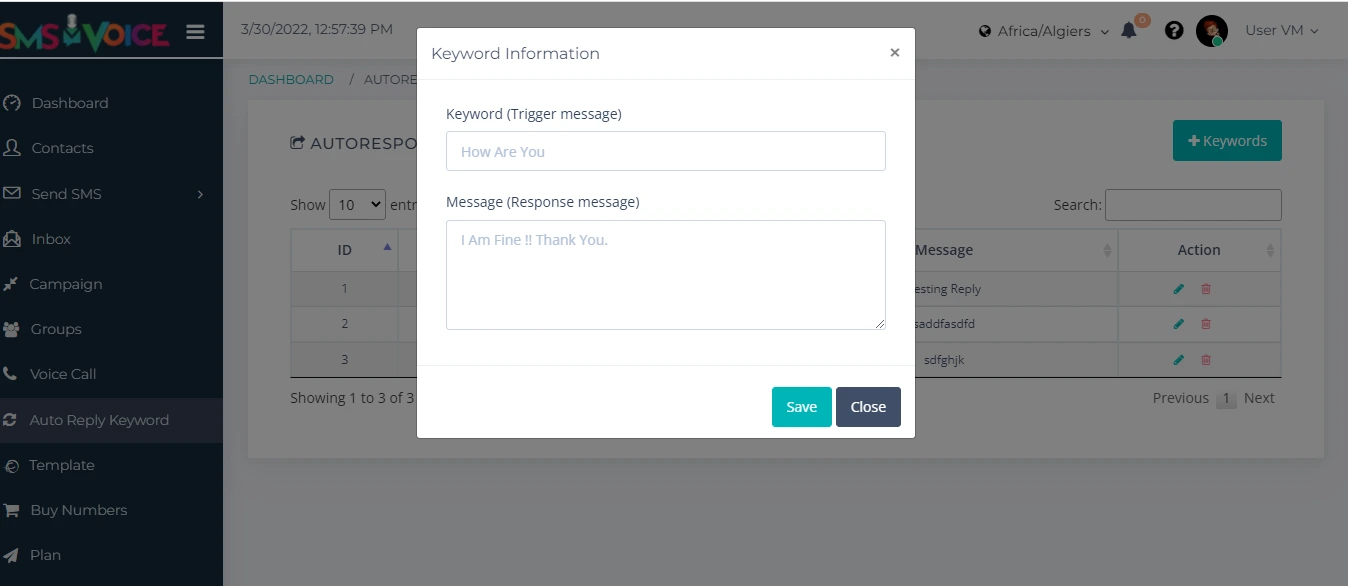
Auto Responder
With this feature, now you can give a predesigned message tempelate using keywords that will be sent to the user who sends you a message with the easy to do following steps.
- Step 1: Click on the
- Step 2: Write the Keyword name and the message associated.
- Step 3: Press
Campaign/Scheduler
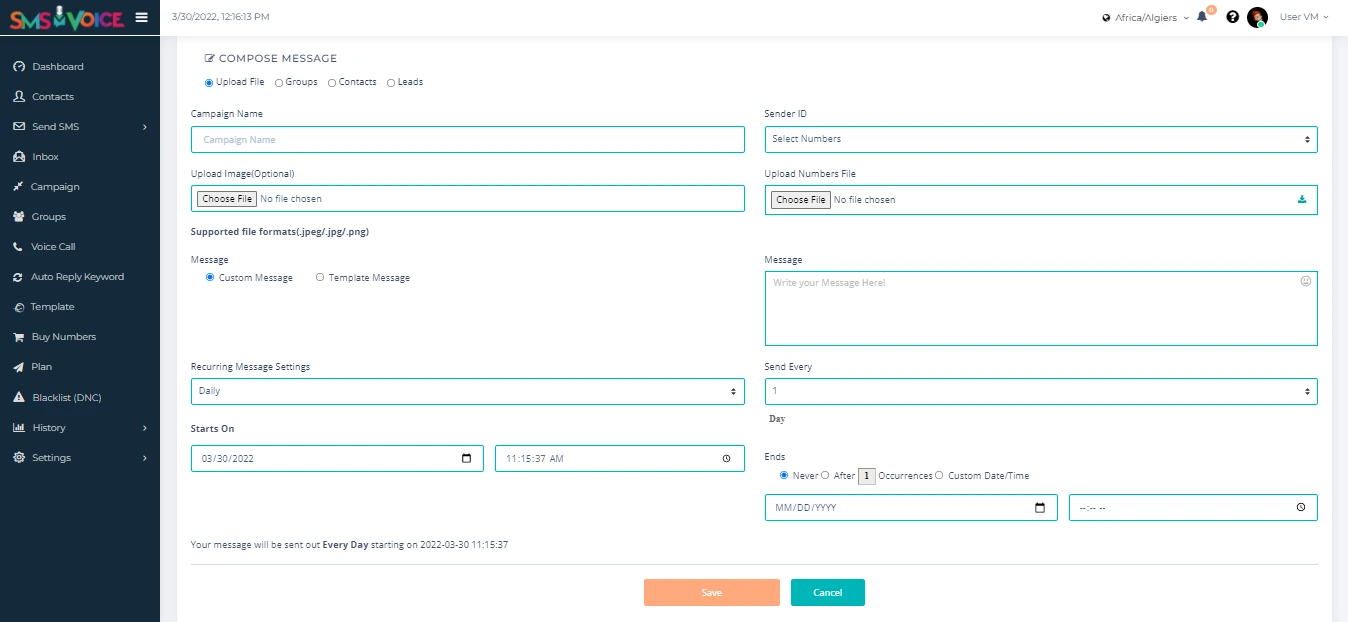
SMS Scheduler
In SMS Scheduler panel, you can send messages to the users/groups/contacts/leads with reference to the particular time and date you decided.
Adding New Schedule
In SMS Scheduler panel, you can send messages to the users/groups/contacts/leads with reference to the particular time and date you decided.
- Step 1: When clicked on the add new schedule button.
- Step 2: In the new window, fill all the details example Upload Type Select Schedule From:(Phone Number) etc.
- Step 3: Select between a template message or a custom message.
- Step 4: Type the message associated.
- Step 5: Press the
Buy Number
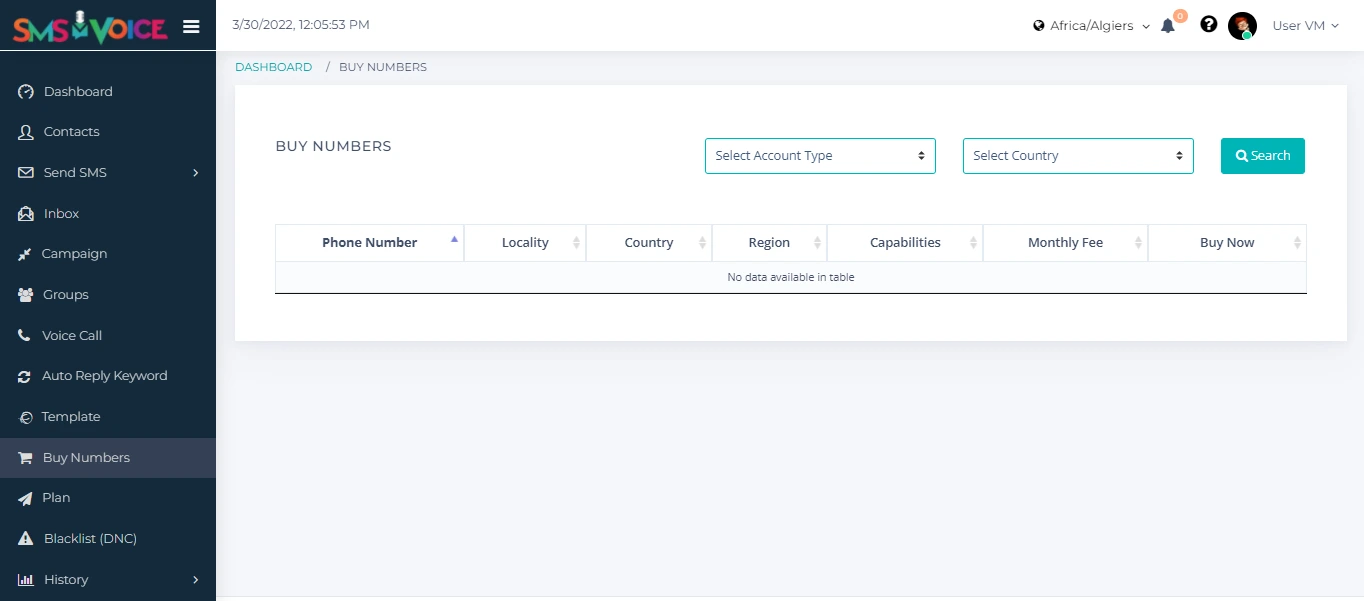
Our Buy Number Interface makes it easy to buy preferred number with your desired/preferred country on just simple clicks.
- Step 1: Select Service Type
- Step 2: Select Country
- Step 3: Buy Number
Black List (DNC)
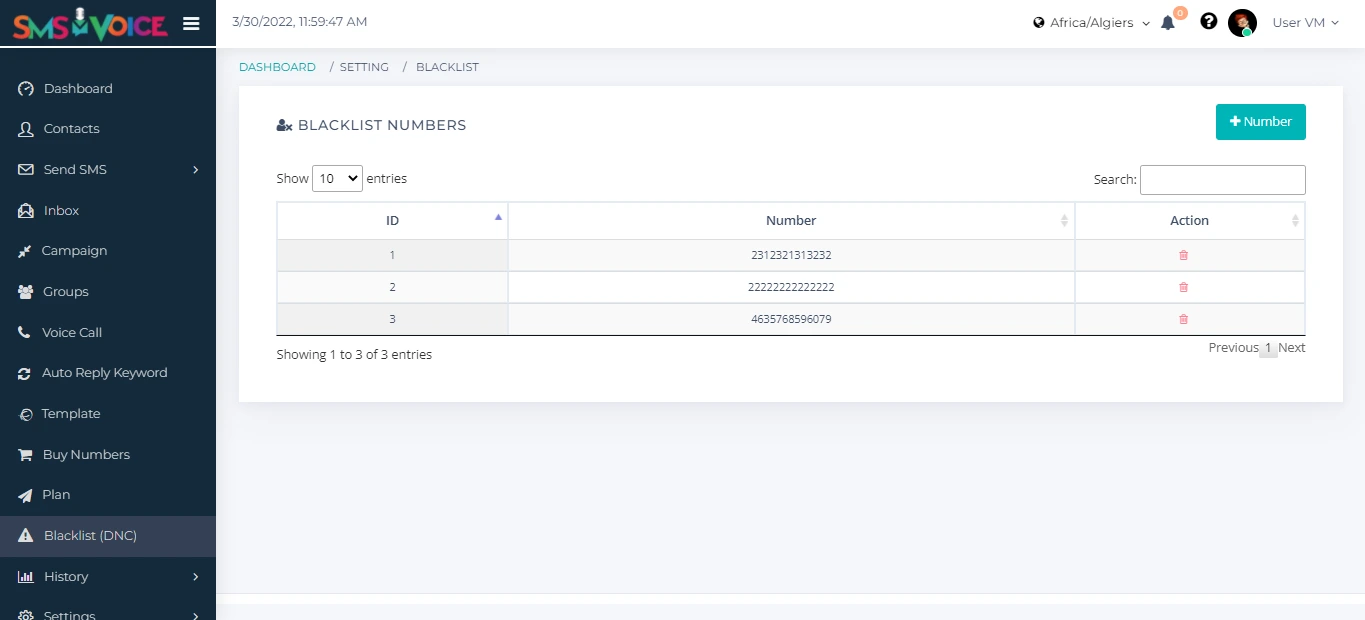
A blacklist is a list of message recipients that decided to opt-out of receiving further SMS messages. Blacklists are mostly used for needs of promotional campaigns where companies give an option to the end customer so he or she does not receive messages irrelevant to them. In some countries having an opt-out inside every SMS message is obligatory by law.
Those lists are used by the Mobile Network Operators for the protection of their users. If one of their subscribers decides to be on the Do Not Disturb list, they will not receive promotional messages, no matter if they’re subscribed to a newsletter or not. This is a method used by MNOs to fight against churn rate and customer spamming.
Copyright © smsandvoice .2023 All rights reserved.